Irix - SNS-HDR Guide by Krzysztof Turzyński
In addition to the full text in English below, there are also downloadable versions below:
-English: Irix – SNS-HDR Guide by Krzysztof Turzyński – ENG
-French: Irix – SNS HDR Pro – guide de Krzysztof Turzyński – FR
-German: Irix -SNS HDR Pro – Leitfaden von Krzysztof Turzyński – DE
-Polish: Irix – SNS HDR Pro – poradnik by Krzysztof Turzyński – PL

Article written by Krzysztof Turzyński
www.TurzynskiFotografia.pl
What is SNS-HDR? It’s a program in which we can increase the dynamics of photos, and it helps to create a really high-quality photo from multiple individual photos, while maintaining a lot of detail in both lights and shadows.
In the guide below I will introduce you to the basics of using the program.
Starting Out
The program is available in English, Bulgarian, Czech, Spanish, Dutch, German, Polish, Russian, Turkish, and Italian, and its interface is not complicated. However at the beginning it may be a bit overwhelming with the number of tools and functions included.
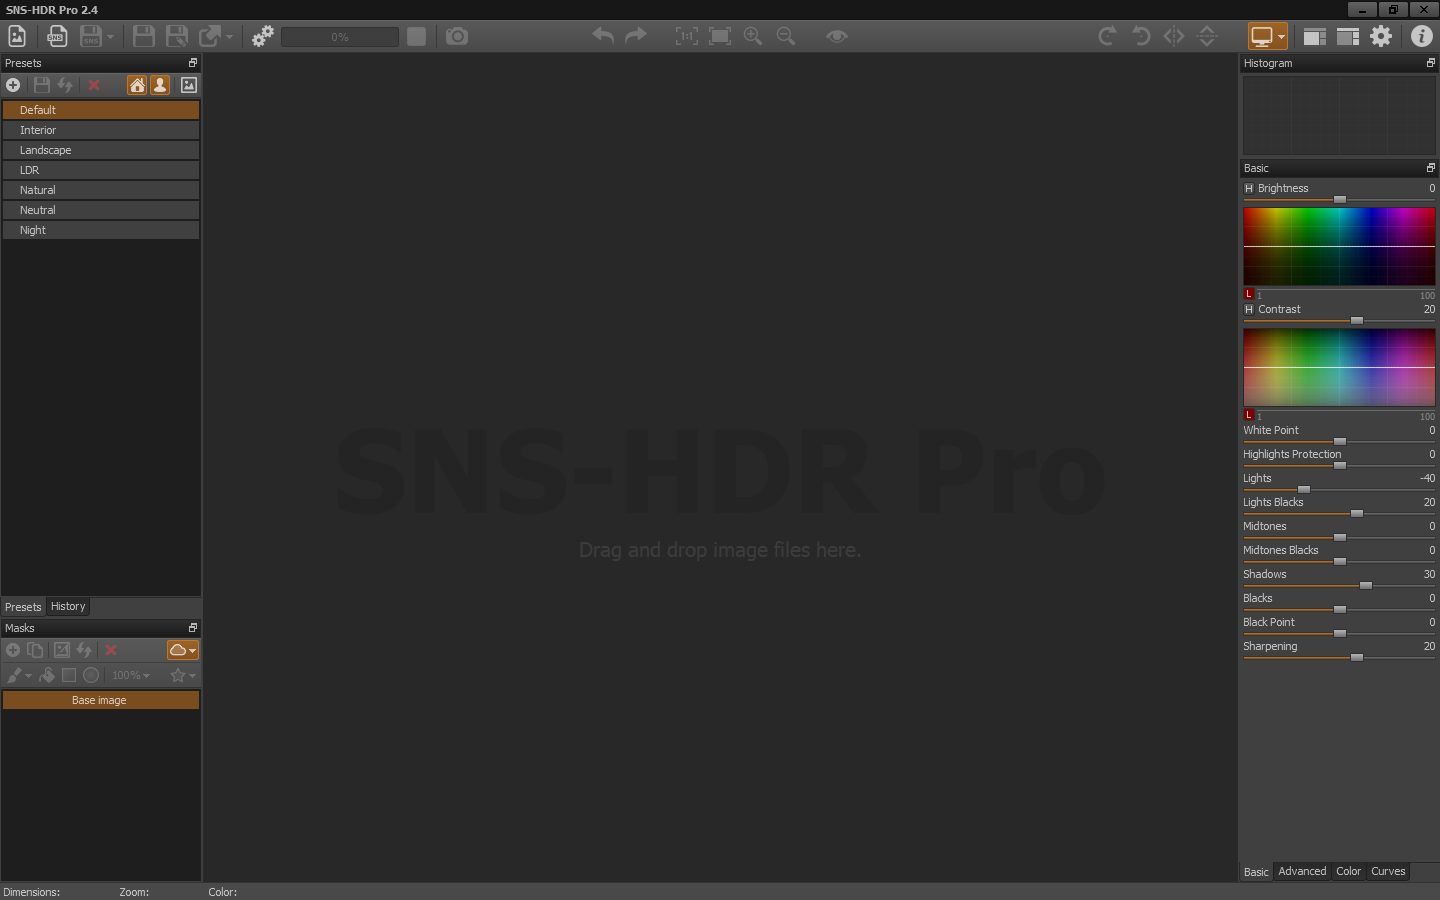
On the left there are tools for importing photos, batch processing, saving a project or a finished photo. (1) Below are the default presets and those created by you which can be created similarly to Lightroom. (2) Below the presets you have a mask window, (3) which operate on a similar principle as those in Photoshop or Lightroom. You can use them to selectively improve elements in a photo.
On the right you have the most important tools that you will work with.
You have three general tabs – basic (4), advanced (5) and color (6).
Beside that are curves, for those that like to work with them (7).
Importing Photos
There are two ways to import photos; the method you choose depends on you. You can drag photos from a folder and insert them into the program, or use the menu and select a new image.
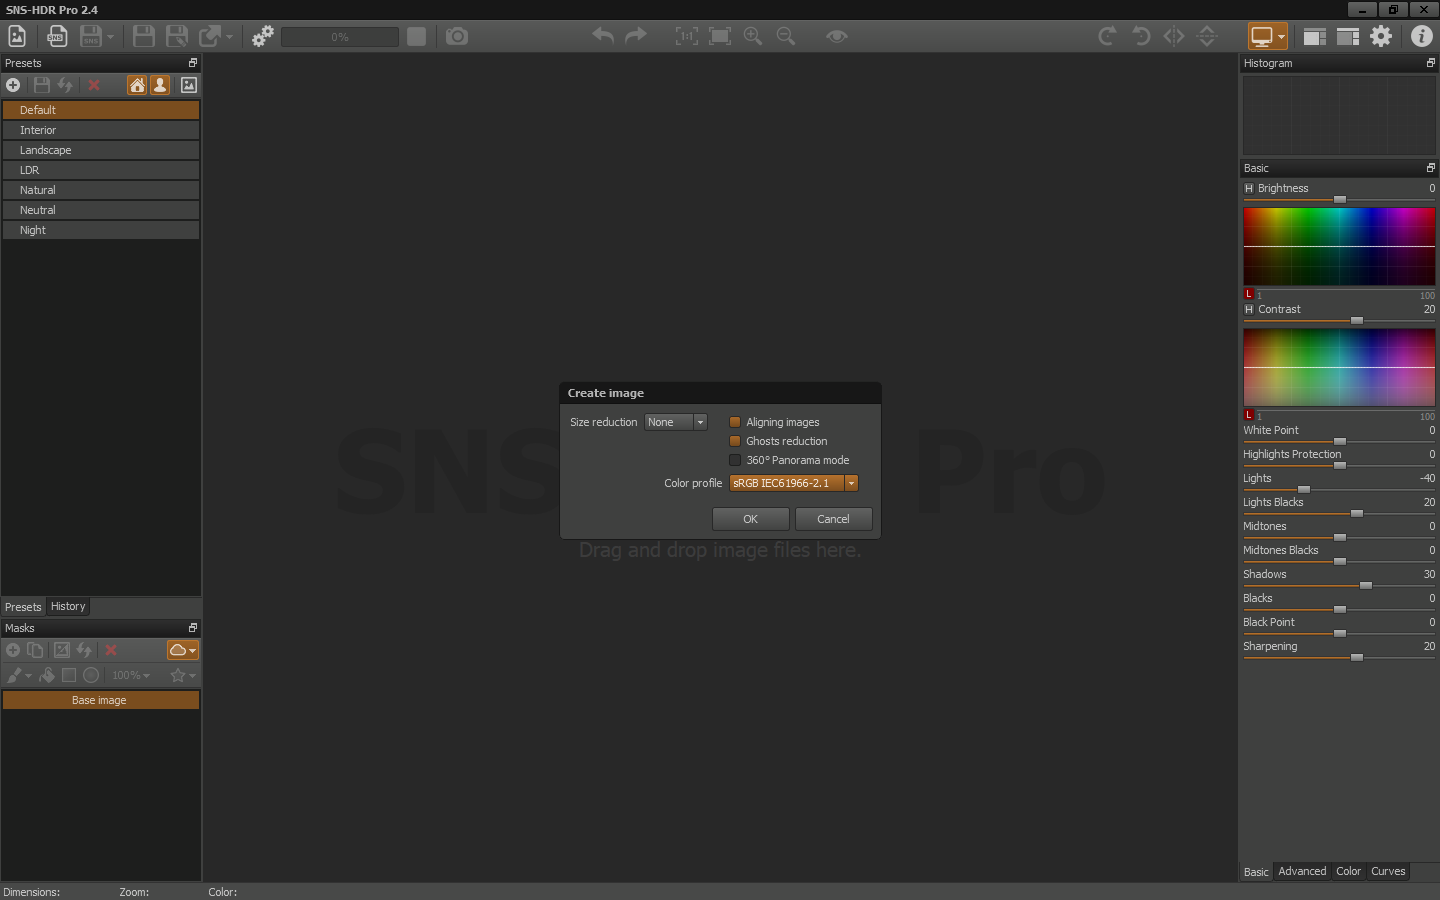
After importing photos, the program will display the above message. By default, the first two options are selected- image alignment (if you happened to move/bump the tripod gently while taking a sequence of photos), and reducing ghosting (where something would move in the frame while taking photos). It’s important to choose a color profile here. Adobe RGB is the default setting – we should change it to sRGB if we are planning to publish it to the internet. After approval, the program assembles the photos we have selected into one, creating wider tonal dynamics. It may take a few moments to process. After it is processed, the photo will appear in the centre of the program.
Editing
As I mentioned in the beginning, the program is very extensive; it features many tools that you will not find in competing software, or finding and utilizing them is much more difficult. We can work on lights, shadows, color halftones, clarity and detail, and much more. I will only show you the main possibilities of this program.
We will focus on the right side of the program because this is the part where we’ll spend the most time on.
I will skip explaining each slider. Instead, I will focus more on showing you how to quickly start working with the program and what you can get from its powerful processing tools.
After importing the photo, the program loads the default preset; if we have our own we can use it, or we can also manually edit the photo.
The Basics
At the very beginning, you can see how many sliders are already in the basic tab:
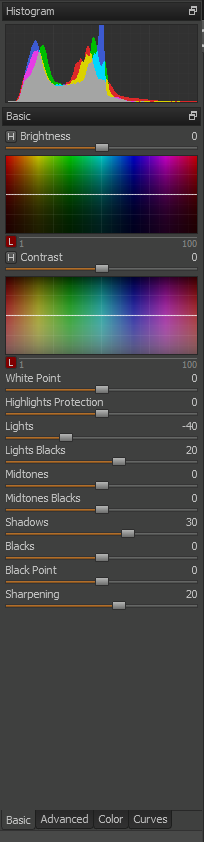
- Brightness
- Contrast
- White Point
- Highlights Protection
- Lights
- Lights Blacks
- Midtones
- Midtones Blacks
- Shadows
- Blacks
- Black point
- Sharpness
In the panel on the left, we can give the photo its initial look by using shadows, blacks, lights, highlights protection, contrast, brightness, etc.
Note the letter H beside brightness and contrast. After pressing it we get more editing tools. Active functions marked with letters are highlighted in orange.
Advanced
Here we can do things such as medium contrast, highlighting of lights, details, or add vividness.

As stated previously, after pressing H we go to the next additional option in this panel.We can also change certain parameters in the photo, such as clarity in the lights, details in lights, highlighting lights, or average contrast in lights.All of this is meant to produce the best possible image balance and dynamically wide scene.
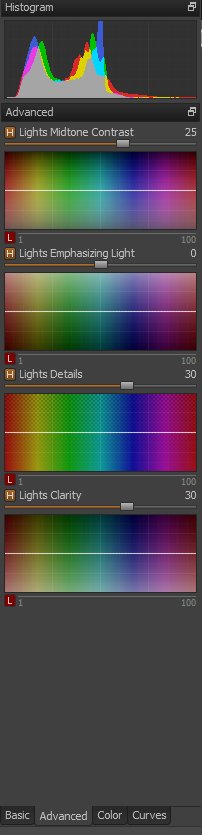
As you can see, the program allows you to operate locally, not globally, as in Lightroom, in which it is unable to work on individual components as above.
Color
This is the last tab that is very important for an interior photographer.
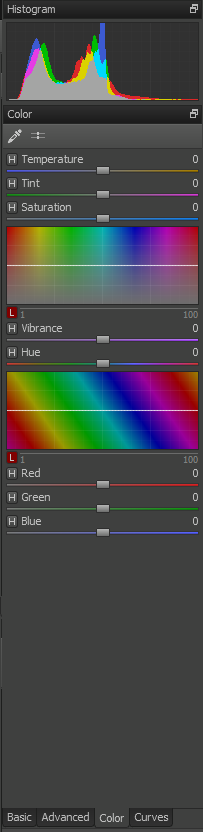 It’s where we give the photo realistic colors.
This tab is similar to what we have in Lightroom. We have HSL at the very bottom for work on individual color channels, and above that, color and intensity. At the top, we have temperature, shadows, and saturation.
However, this is not the end; here we can also activate additional tools using the H button.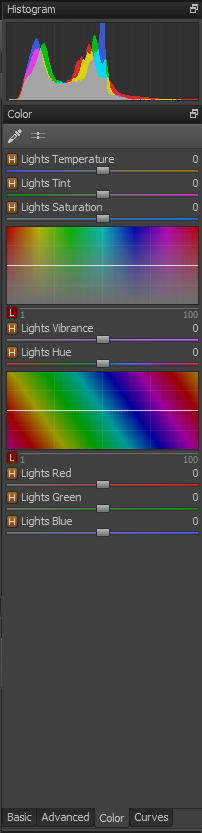
Here we can very accurately influence the color of our photo. We can work on each color separately at the very bottom of the panel. We can affect the intensity of the lights and their color, and at the very top, the temperature of the lights, shadows, and saturation.
As you can see, the program is an amazing tool, being very accurate and feature-rich. It allows you to get very high-quality photos that I have always wanted to save in TIFF format, and later process it in Lightroom, producing the final product to the customer there.
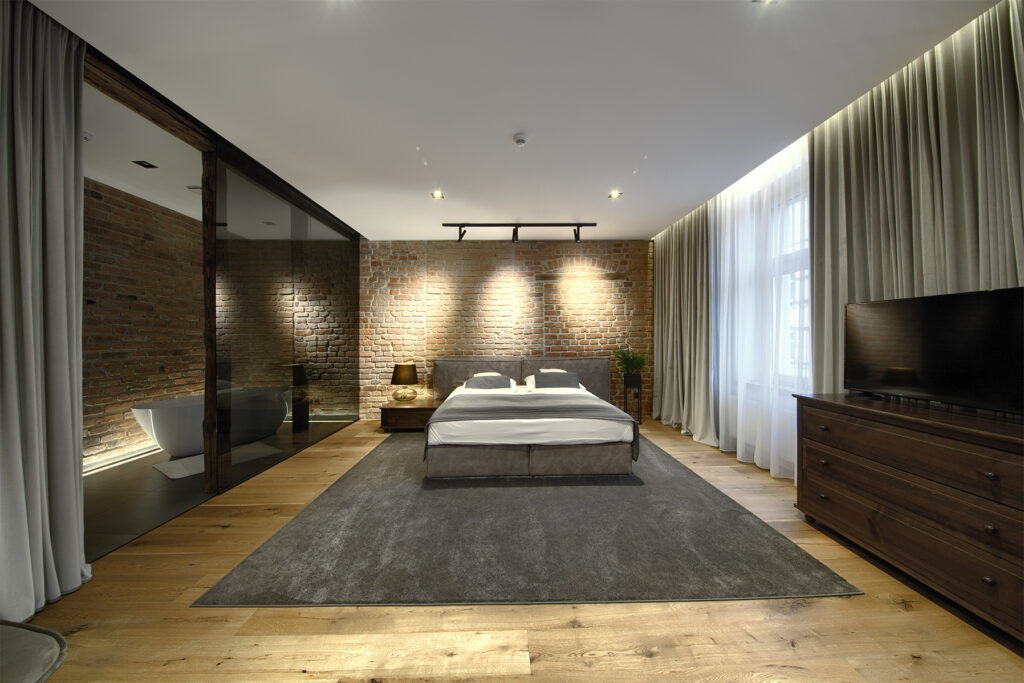
A photo with traditional editing/processing:
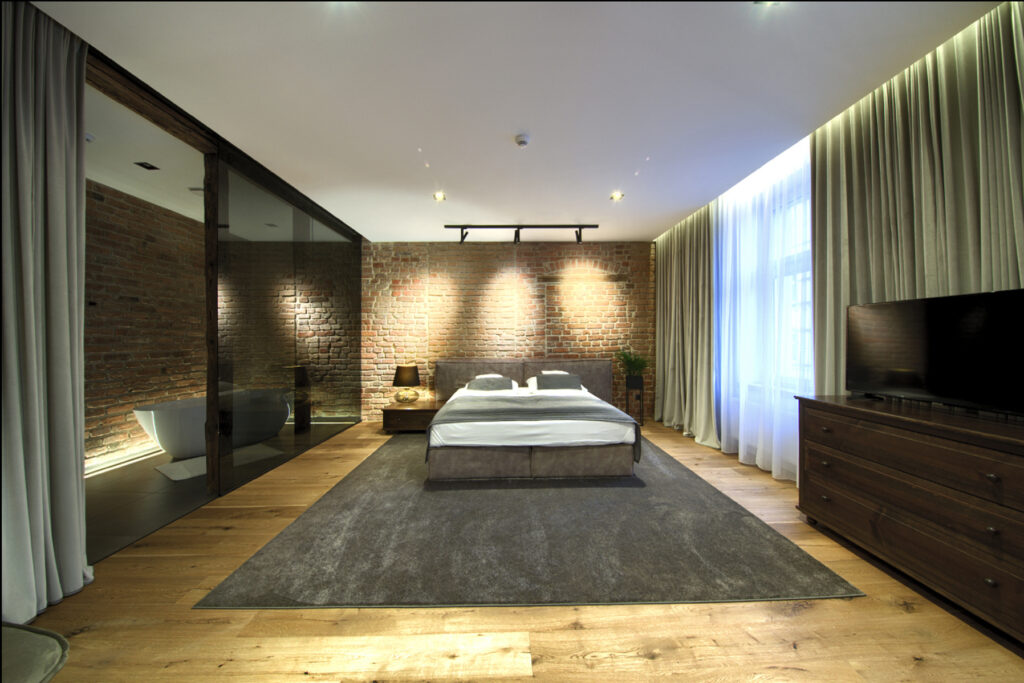
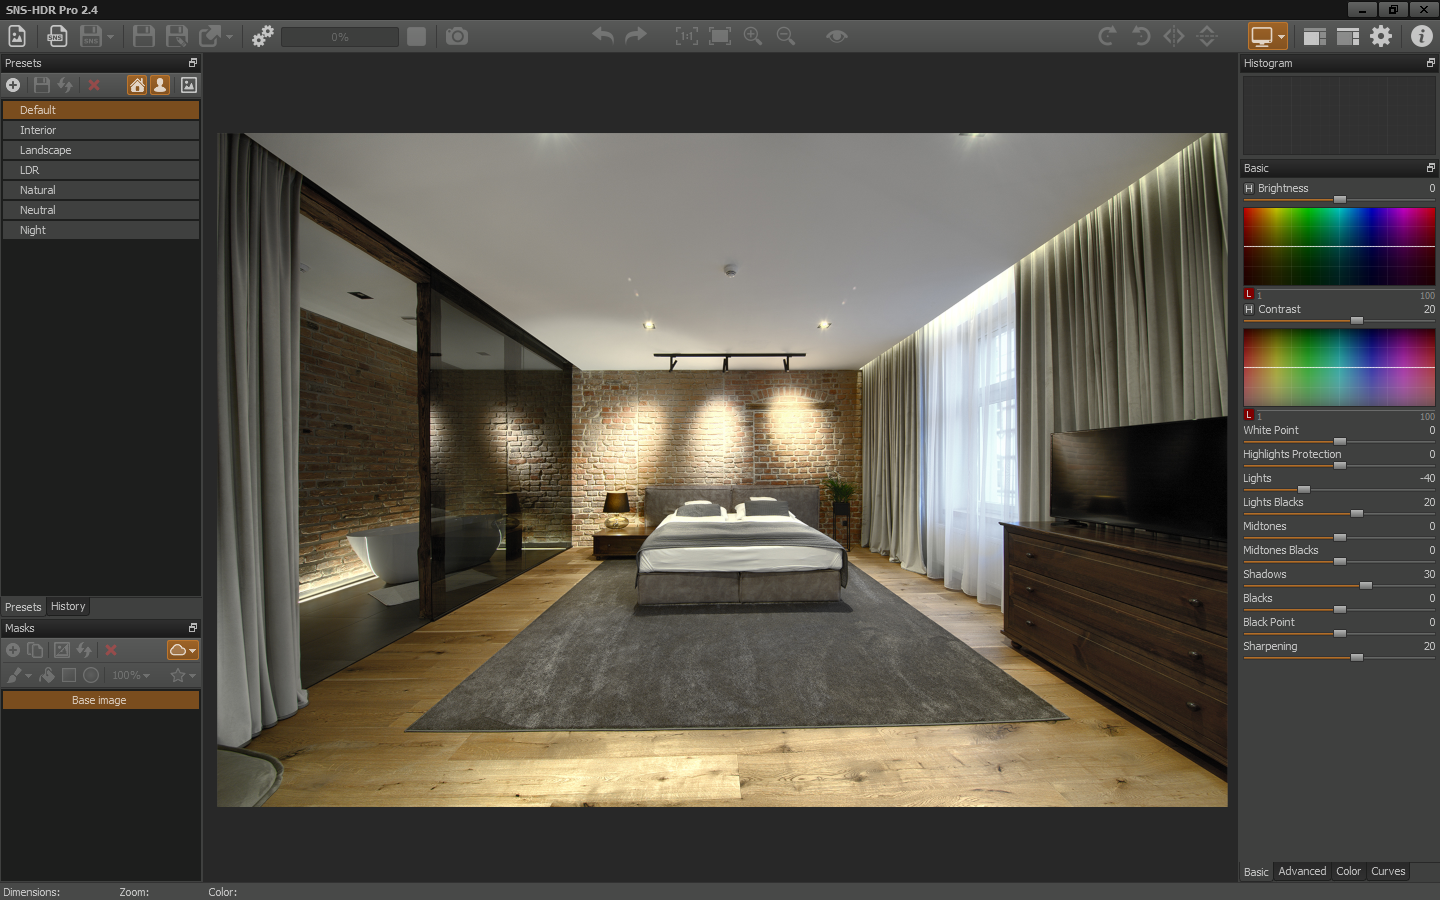
A photo after processing it with SNS HDR: